Install Noxen on macOS
Drag-to-Applications, first launch, and one-click license activation — the five-minute path from purchase email to a ready-to-scan Noxen install.
Before you start
Make sure your Mac meets the prerequisites — Noxen is a native macOS
app and uses several modern frameworks (CryptoKit for feed verification,
Network.framework for raw port scanning, SwiftData for
local storage). The system
requirements page has the full list, but the headline numbers are:
- macOS 26 or later on an Apple Silicon Mac (M1 or newer).
- SSH access to each host you want to scan (key-based preferred).
- iCloud / CloudKit sync is wired but currently disabled in v1.0 — Noxen stores everything locally and works fully offline. (Re-enabled in lock-step with the upcoming iOS view-only companion.)
Download
Noxen ships as a notarised .dmg. The latest stable
build is at
releases.noxen.app/Noxen-1.0.4.dmg
(hosted on Cloudflare R2). The same link sits on the
homepage and on pricing.
Purchased licenses also receive the link in the post-checkout email.
Verify the download is the file we shipped — every release is signed with the Noxen Developer ID certificate and notarised by Apple. macOS Gatekeeper checks both before first launch; if either signature is missing, the dialog text changes from "Noxen.app is from a verified developer" to "unidentified developer", and you should not run the build.
First launch
Drag Noxen.app from the mounted .dmg
to /Applications, eject the disk image, then
double-click Noxen in Applications. macOS prompts once to
confirm the app is from a verified developer; choose
Open. From here on, Noxen launches straight
from the Dock or Launchpad like any other Mac app.
On first launch, Noxen shows a four-page welcome sheet that explains what scanning means, what data leaves your Mac (very little — see the privacy reference), and offers two opt-in toggles:
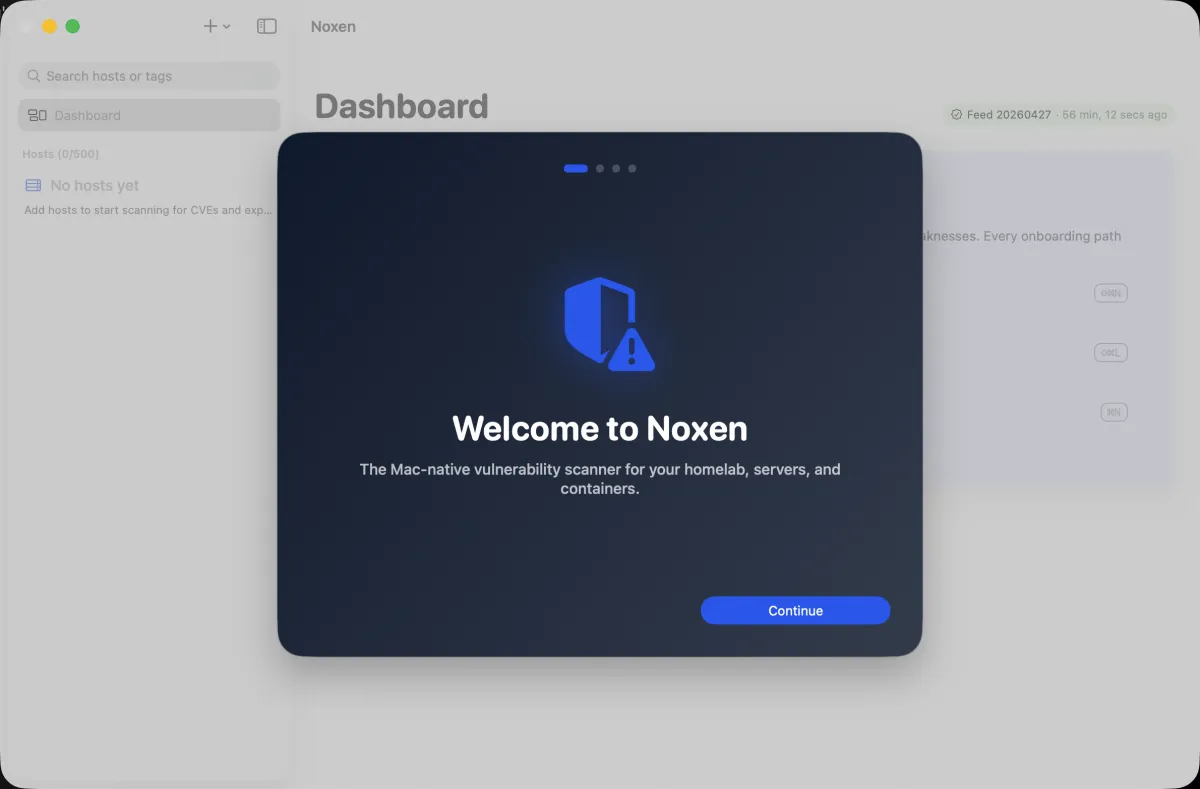
~/.ssh/config
import — both can be turned on later from Settings.- Download CVE feed now. Pulls the signed
~95 MB daily snapshot from
feed.noxen.appso the first scan has data to match against. Skipping this is fine if you're on a metered connection — the feed downloads automatically before your first scan instead. - Import hosts from
~/.ssh/config. Reads your existing SSH config and lets you choose which hosts to enrol. Wildcards (Host *.home) are skipped; only concrete hosts are offered. See SSH config import for the details.
Both opt-ins are reversible — toggle them later from
Settings → Account. Noxen never reads your
~/.ssh/config until you explicitly run the import,
and never sends host inventories to any server.
License activation
Noxen is free to use against up to 3 hosts. Beyond that, a one-time license unlocks 25 hosts (Noxen 1.x), and the Live Feed subscription unlocks 100 with daily-rebuilt CVE coverage — see pricing for the full tier matrix.
When you purchase a license, Paddle emails an activation
key plus a one-click activation URL of the form
noxen://activate?key=…. macOS recognises the
noxen:// scheme and routes the click directly to
the running app, which writes the key into the macOS Keychain
and refreshes the entitlements pane.
If the deep-link doesn't fire — for example, you're activating Noxen on a different Mac to the one that opened the email — paste the key manually:
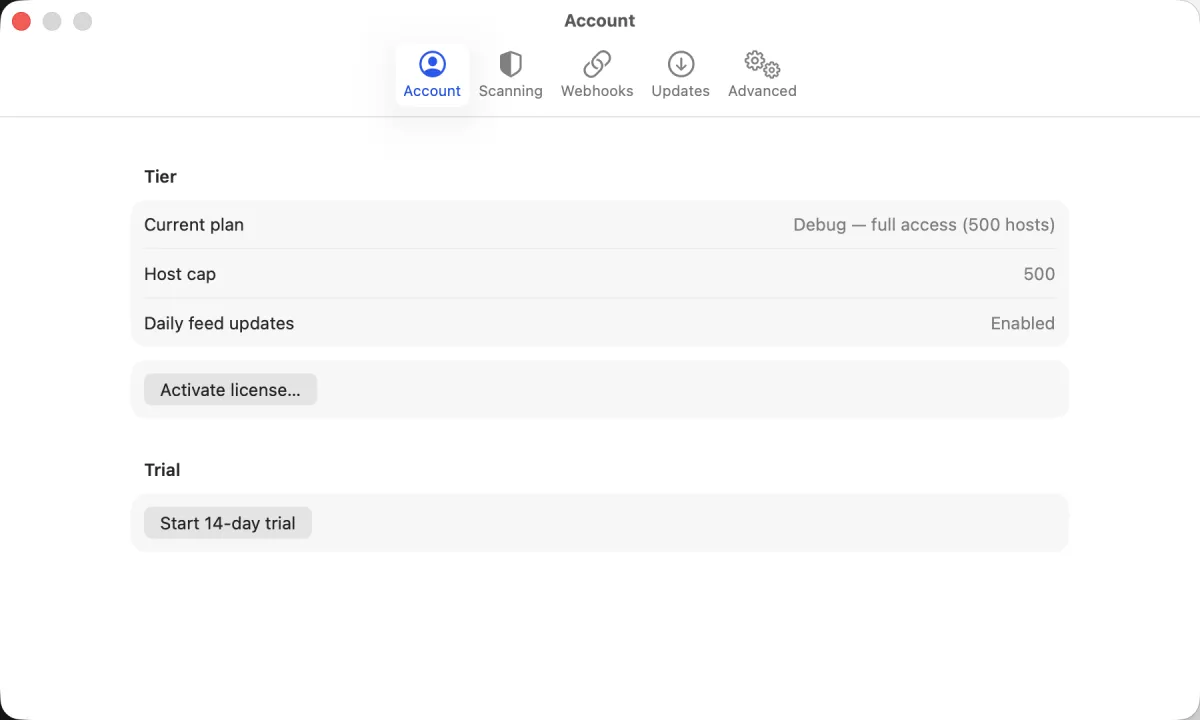
- Open Noxen → Settings… (or press ⌘,).
- Switch to the Account tab.
- Paste the key into the Activate license field and click Activate.
If activation fails with "License key invalid or already used", the most likely cause is a copy-paste artefact (smart quotes, leading whitespace) — paste into a plain-text field first to inspect, then re-copy. License keys are machine-bound: a key activated on Mac A will refuse activation on Mac B until you deactivate from Mac A's Settings → Account pane first.
Verify the install
A successful install + activation lands you at the empty Hosts list with the + Add host menu in the sidebar, the host cap shown in the toolbar, and the CVE feed indicator either green ("up to date") or progress-spinning ("downloading"). If you skipped the feed download, the indicator stays grey until your first manual scan triggers it.
Common questions
What macOS version do I need to run Noxen?
Noxen requires macOS 26 or later on an Apple Silicon Mac (M1, M2, M3, M4, or newer). Intel is not supported — macOS 26 itself drops Intel. We test against the current and previous major macOS releases.
Why isn't Noxen on the Mac App Store?
The Mac App Store requires the App Sandbox, which blocks two
capabilities Noxen depends on: reading ~/.ssh/config
to import your existing host configurations, and opening raw
sockets for the LAN port-22 sweep. Noxen is distributed as a
notarised Developer ID build instead — the same channel most
indie Mac apps use. There's a longer write-up at
why Developer ID
and not the App Store.
Does Noxen need admin privileges or sudo?
No. Noxen runs as your normal user account. It needs no admin password during install (just drag-to-Applications) and no privilege elevation at runtime. SSH into remote hosts uses your existing user-scoped SSH keys; the LAN scan opens raw sockets via macOS's standard user-space APIs.
How does the one-time license activate?
Paddle emails you a license key after purchase. In
Noxen, paste the key into Settings → License
(or click the noxen://activate?key=… link from
the email and the app handles the rest). The key is stored
in your macOS Keychain, scoped to Noxen's app group, and
never synced anywhere.
What if I lose my license key or move to a new Mac?
Email hello@noxen.app with the email address you bought from and we'll resend the key. Paddle also keeps a customer portal where you can fetch the key yourself. A personal license activates on up to three Macs you personally use; if you've reached the cap, deactivate one from Settings → Account first or email us for help.
What's next
You're ready to add a host and
run your first scan, or jump straight to importing
from ~/.ssh/config if you have a populated
SSH config to enrol from.